Imagine your prospective students trying to get into your school, but instead of waiting on hold, sending endless emails, googling or scrollling through your social media, they chat with a friendly bot who answers all their questions 24/7.
Sounds like a dream?
It’s quickly becoming a reality in higher education. According to a recent survey, students aren’t just open to chatbots—they expect them.

Why?
With Gen Z’s desire for instant responses and 24/7 service, chatbots are stepping up to provide smarter, faster, and more efficient ways for educational institutions to engage with prospective students.
In this article, we’ll show you a step-by-step guide on how to build your educational support chatbot with Omnimind.ai and embrace the future of student engagement!
Step 1: Begin Your AI Journey
Sign up/Login Omnimind.ai and start creating your first AI Agent! Click on the “Get started” button in the Create AI Agent section.
You’ll see a friendly interface that guides you through building your own AI assistant. The platform makes it super easy to follow step-by-step instructions to create your virtual admissions counselor. And don’t worry if you’re new to AI—there’s even a helpful video tutorial to show you exactly how it works!
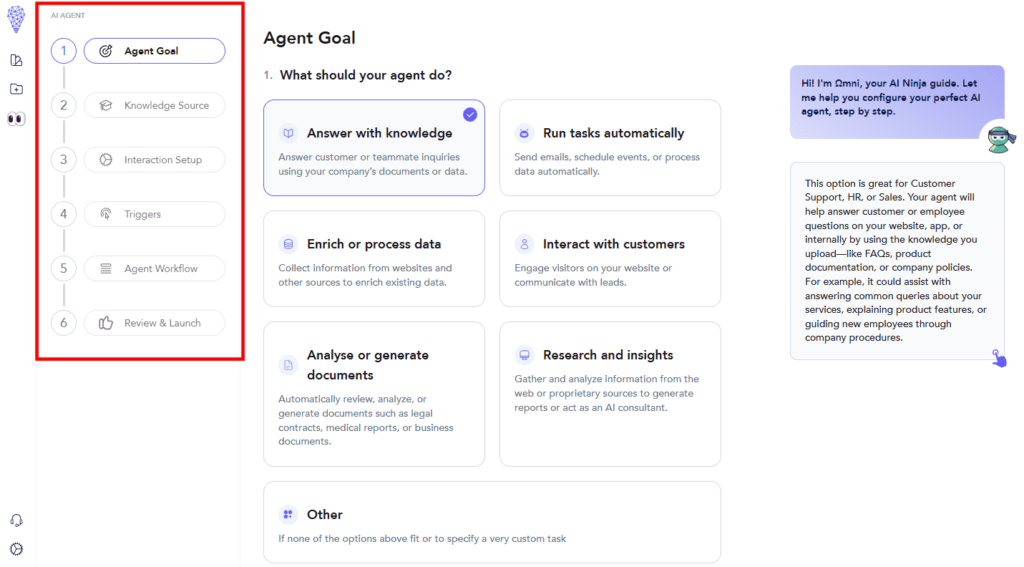
Step 2: Define Your Agent’s Purpose
Time to give your AI assistant its mission! In the Agent Goal section, select “Answer with knowledge”—this is perfect for our educational support bot. This option lets your agent answer questions using your institution’s documents and data. It’s exactly what we need for helping prospective students learn about your courses, programs, and admission processes!

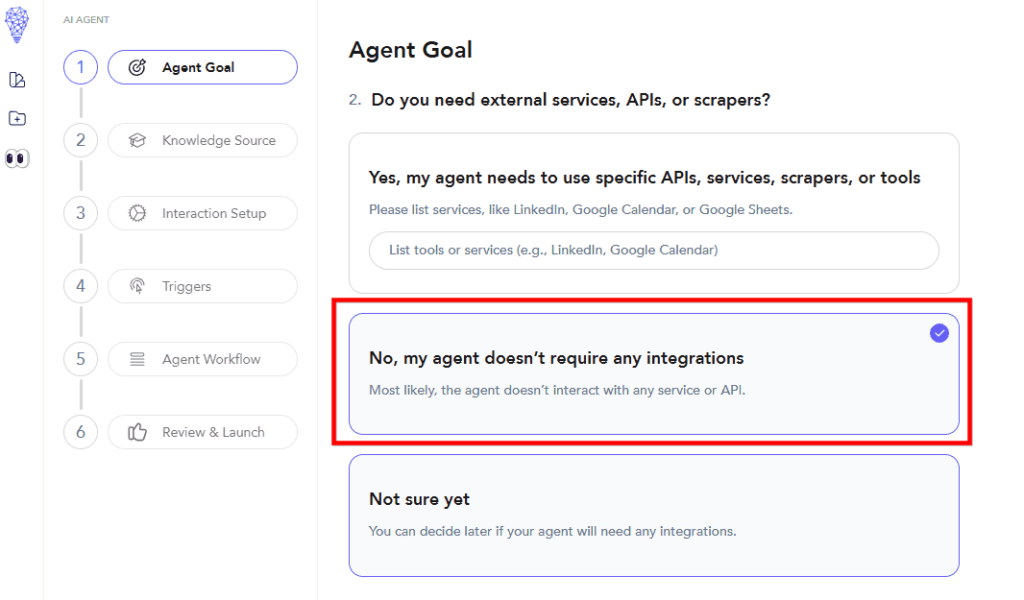
Step 3: Choose Your Integration Needs
For our educational support bot, we’ll keep things simple! Select “No, my agent doesn’t require any integrations” since we’ll focus on answering questions using our own educational materials. This setup is perfect for handling admission inquiries, course information, and student questions without needing external services. Of course, you can always add integrations later if you need them!
Step 4: Configure Your Agent’s Knowledge
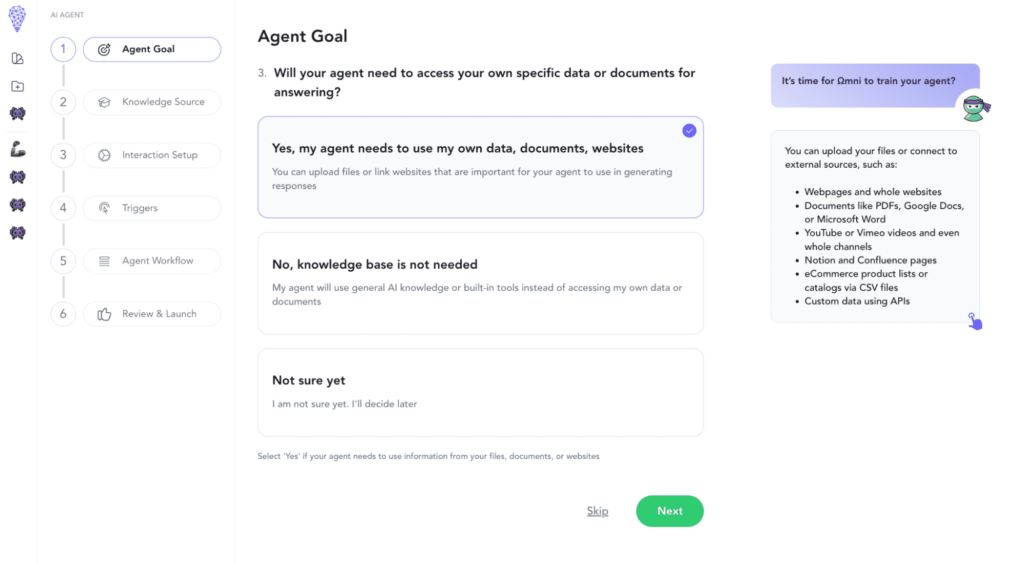
Here comes an important decision! When asked about accessing data, select “Yes, my agent needs to use my own data, documents, websites.” This choice is vital because it allows your agent to:
- Learn from your institution’s webpages and websites
- Access important documents like PDFs, Google Docs, and Word files
- Use educational content from YouTube or Vimeo channels
- Reference information from Notion and Confluence pages
- Work with course catalogs and program lists
This way, your bot will be able to provide accurate, specific information about your educational offerings!
Step 5: Choose Your Interaction Channel
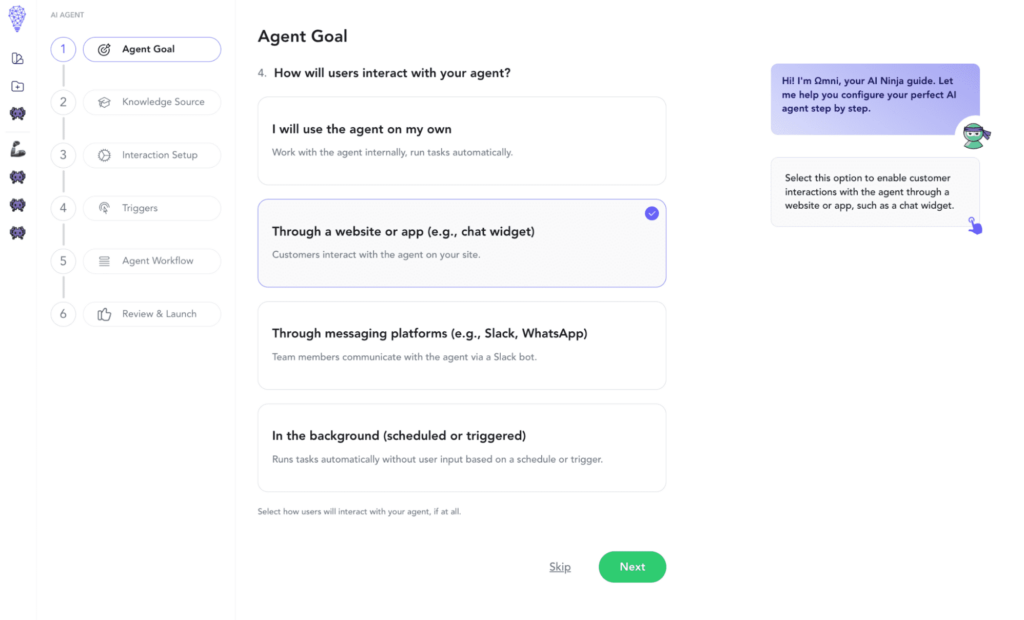
Now, let’s decide how students will interact with your bot! For educational institutions, you have several fantastic options:
- Through a website or app. Perfect for embedding a chat widget right on your institution’s website where prospective students can easily find it
- Via messaging platforms. If your student community uses Slack or WhatsApp, you can meet them where they are by integrating your bot there
- Personal use. You can also use the agent internally for your admissions team
Choose “Through a website or app” if you want to make your bot accessible to all website visitors, or select the messaging platform option if you prefer to provide support through Slack or WhatsApp. The choice is yours—pick what works best for your students!
Step 6: Define Your Agent’s Purpose
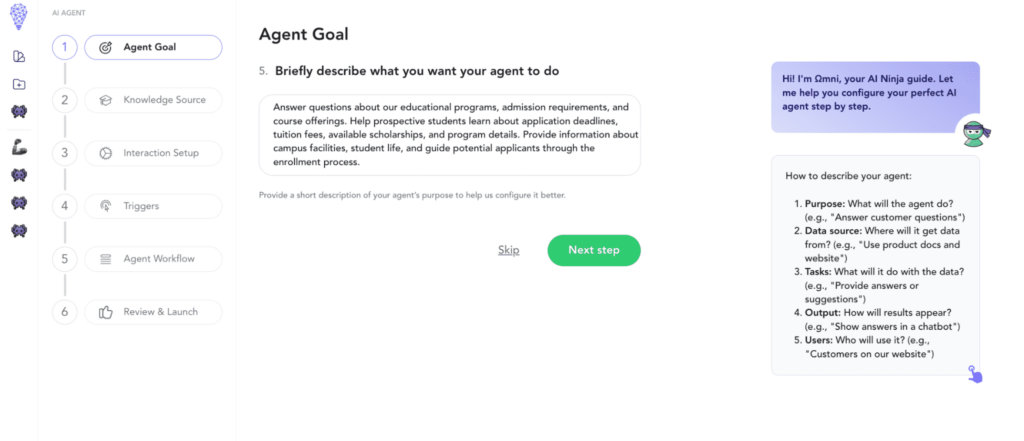
Now for the final touch—let’s tell your agent exactly what it needs to do! In the description field, you’ll want to be clear and specific about your bot’s educational mission. Here’s a perfect description you can use as a template:
Feel free to use the example shown in the screenshot below:
“Answer questions about our educational programs, admission requirements, and course offerings. Help prospective students learn about application deadlines, tuition fees, available scholarships, and program details. Provide information about campus facilities, student life, and guide potential applicants through the enrollment process.”
This helps Omni understand exactly how to assist your future students!
Step 7: Add Your Knowledge Sources
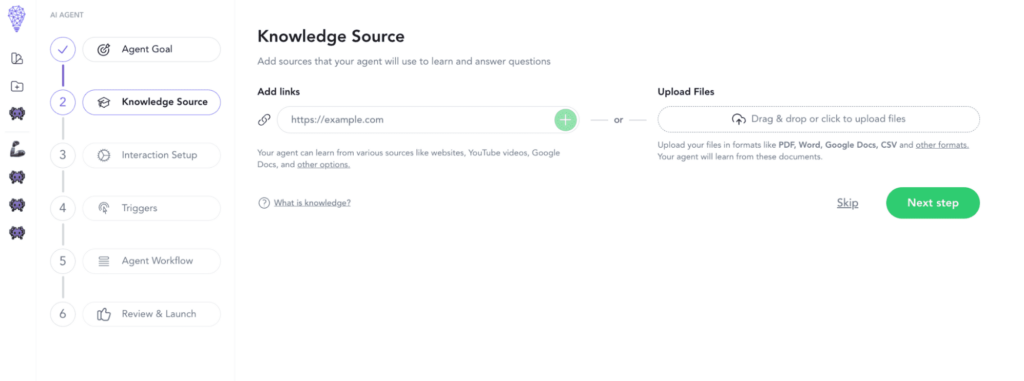
Now it’s time to feed your bot with all that valuable educational content! You have two easy ways to do this:
- Add links to your educational resources:
- Your institution’s website
- Course catalog pages
- Program description URLs
- Student handbook links
- YouTube channel with campus tours and program overviews
- Upload your files directly:
- PDF brochures and catalogs
- Word documents with course details
- Google Docs with admission requirements
- CSV files with program data
- Any other important documents
This is where your bot really starts to learn about your institution. The more comprehensive materials you provide, the better it will be at helping prospective students!
Step 8: Configure Your Chat Interface
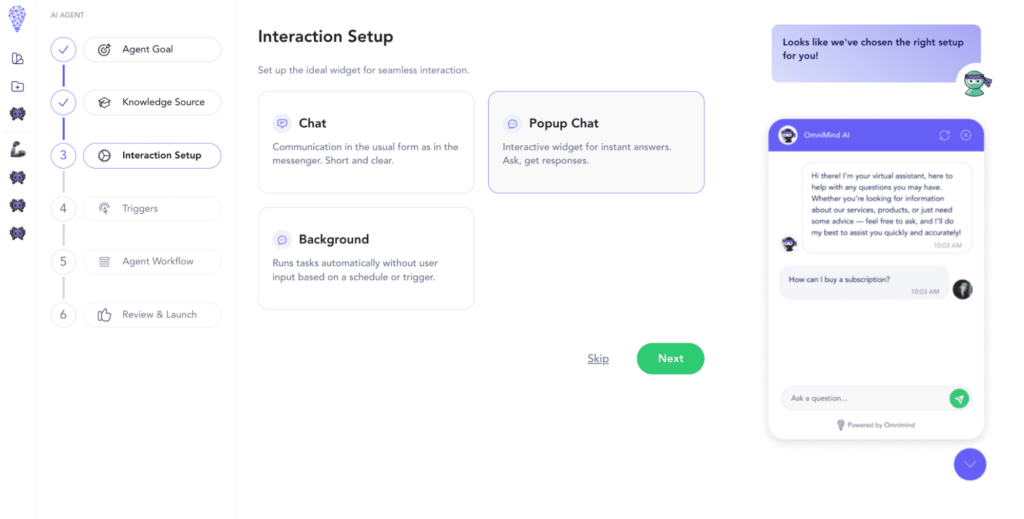
Time to decide how your bot will interact with prospective students! You have two great options:
- Standard Chat
- Perfect for a more traditional messaging experience
- Provides clear, straightforward communication
- Familiar format that students are comfortable with
- Great for detailed conversations about programs and requirements
- Popup Chat
- Ideal for quick questions and instant answers
- Interactive widget that appears on your website
- Less intrusive design that students can easily minimize
- Perfect for initial inquiries about admissions and courses
Choose the style that best matches your institution’s website and your students’ needs. The preview on the right shows you exactly how it will look on your site!
Step 9: Set Up Triggers (Optional)
This is an optional but powerful feature that can make your bot even more helpful! You can set up various triggers to automate interactions:
- Time-based triggers
- Schedule welcome messages during peak admission seasons
- Send automatic reminders about application deadlines
- Trigger periodic updates about campus events
- Email integration
- Connect with Gmail to respond to inquiries automatically
- Send follow-up information after initial conversations
- Provide instant responses to email queries
- Webhook integration
- Connect with your existing systems
- Trigger responses based on student portal activities
- Integrate with your CRM for better lead management
Remember, these triggers are completely optional—your bot will work perfectly fine responding to student messages without any triggers set up. You can always come back and add them later!
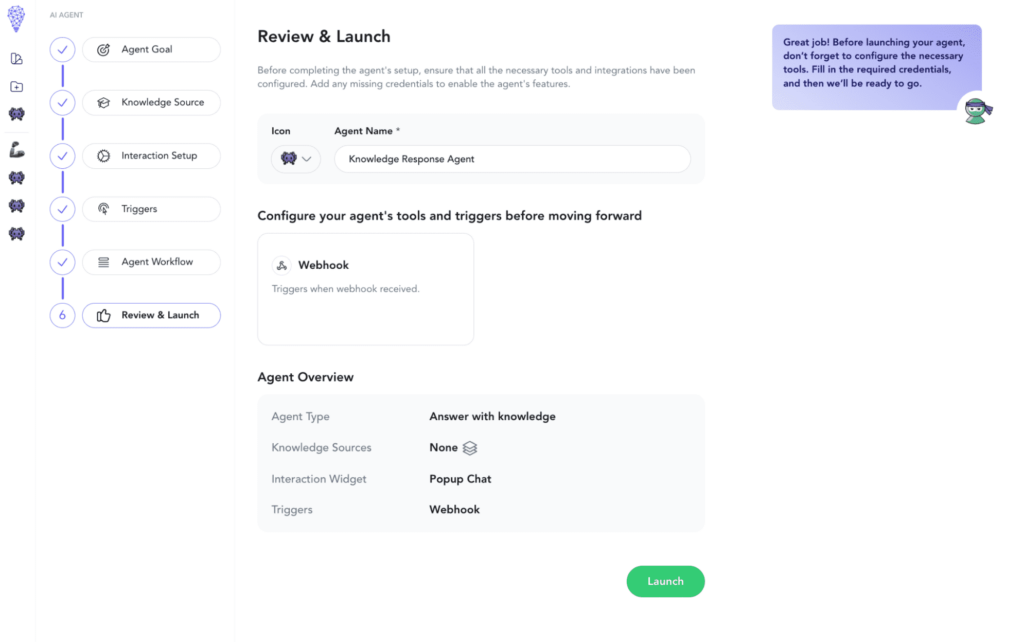
Step 11: Name Your Agent and Launch
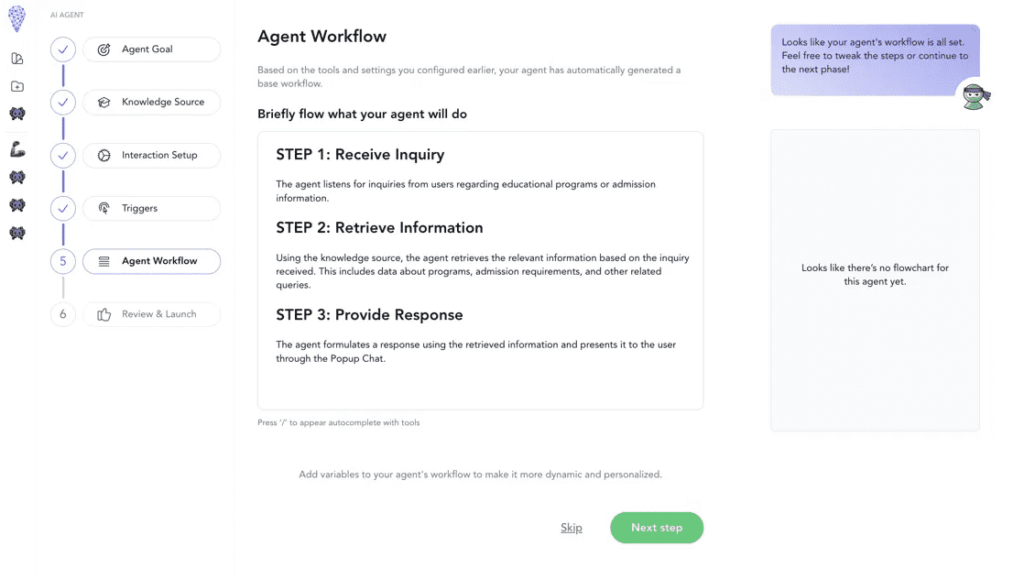
We’re at the finish line! Now it’s time to give your educational assistant an identity:
- Choose an appropriate icon that matches your institution’s style
- Give your bot a friendly name like “Knowledge Response Agent” or something that reflects your institution
- Review the configuration summary showing all your choices:
- Agent Type: Answer with knowledge
- Knowledge Sources setup
- Interaction Widget type
- Selected triggers
Double-check all your settings, make sure any required credentials are in place, and hit that Launch button to start helping prospective students!
In conclusion, building AI Admissions Counselor can transform the way you engage with prospective students, making the process more efficient, accessible, and responsive.
With the step-by-step guide using Omnimind.ai, you can easily create a tailored chatbot that answers all your students’ questions, from course details to admission processes. This personalized, always-available support system can significantly boost student engagement and help increase enrollment by 30%.
Don’t miss out on the future of student support—start building your own AI Admissions Counselor today!

How useful was this post?
Click on a star to rate it!
Average rating 5 / 5. Vote count: 2
No votes so far! Be the first to rate this post.

