- Step 1: Begin Your AI Journey
- Step 2: Define Your Agent’s Purpose
- Step 3: Choose Your Tools and Integrations
- Step 4: Configure Your Healthcare Knowledge Base
- Step 5: Choose The Right Chat Interface
- Step 6: Define Healthcare Communication Parameters
- Step 7: Select Your Tools & Services
- Step 8: Add Secure Knowledge Sources
- Step 9: Set Up Chat Interface
- Step 10: Set Medical Response Triggers
- Step 11: Ready to Launch!
- Elevate Your Healthcare Communication
In today’s healthcare landscape, the gap between patient inquiries and immediate, accurate responses can mean the difference between engagement and abandonment.
Healthcare providers face an unprecedented challenge: delivering consistent, accurate information while maintaining HIPAA compliance and ensuring patient safety.
Consider this:
- Healthcare providers spend an average of 4.5 hours daily responding to routine patient queries, with 73% of these questions being repetitive.
- 68% of patients report postponing care due to communication barriers.
Introducing the Healthcare AI Assistant
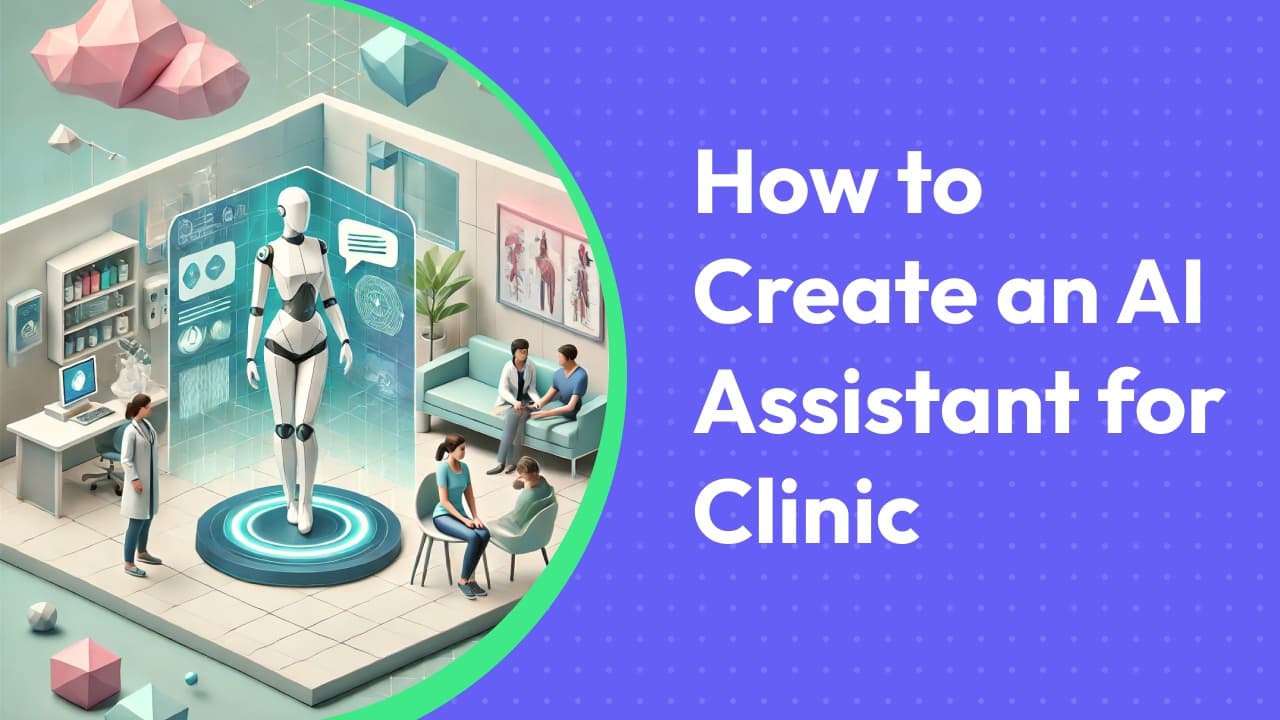
A sophisticated solution that transforms patient support while maintaining the highest standards of medical communication. This isn’t just a chatbot; it’s your digital healthcare professional, available 24/7, equipped with perfect recall of protocols, procedures, and patient education materials.
Ready to revolutionize your patient communication?
Let’s begin.
Step 1: Begin Your AI Journey
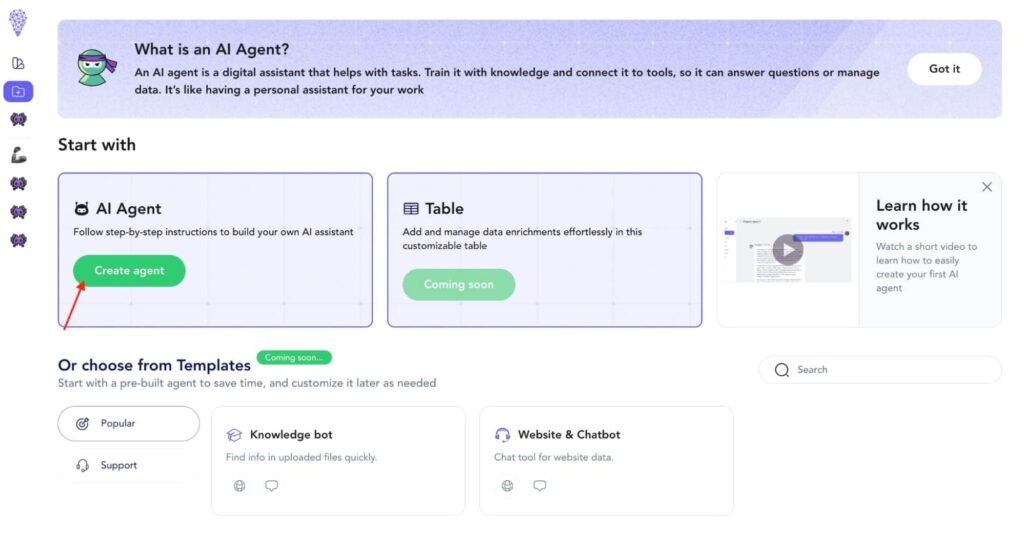
Launch your transformation by accessing Omnimind.ai.The interface guides you through creating a healthcare-specific AI agent that embodies your practice’s expertise.
Essential Setup Tasks:
- Select “Create AI Agent” for complete customization.
- Choose an icon representing healthcare (e.g., medical cross).
Step 2: Define Your Agent’s Purpose
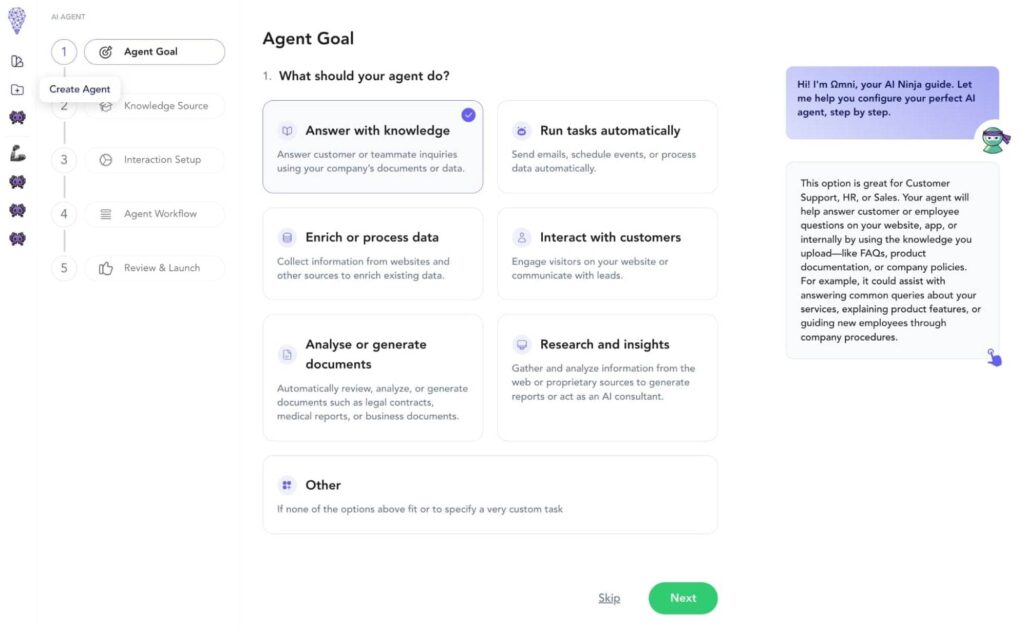
Select “Answer with knowledge” to establish your healthcare assistant’s foundation. Your AI will master:
✅ Patient inquiry management
✅ Appointment scheduling guidance
✅ Insurance and billing information
✅ Basic medical information distribution
✅ Protocol and procedure explanations
Step 3: Choose Your Tools and Integrations
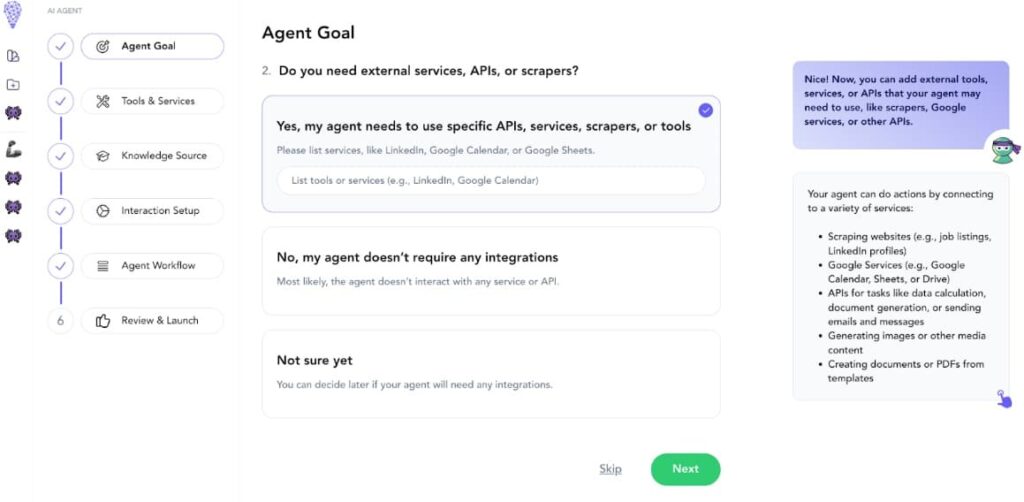
Equip your healthcare assistant with essential capabilities:
Required Tools:
- AI Prompt – For generating accurate, compliant responses.
- Webpage Scraper – For maintaining up-to-date healthcare information and regulatory requirements.
- Google Sheets Data Reader – For managing schedules, protocols, and on-duty professionals.
WhatsApp Integration enables secure messaging for:
- Appointment reminders
- Follow-up care instructions
- General health inquiries
- Patient education materials
Step 4: Configure Your Healthcare Knowledge Base
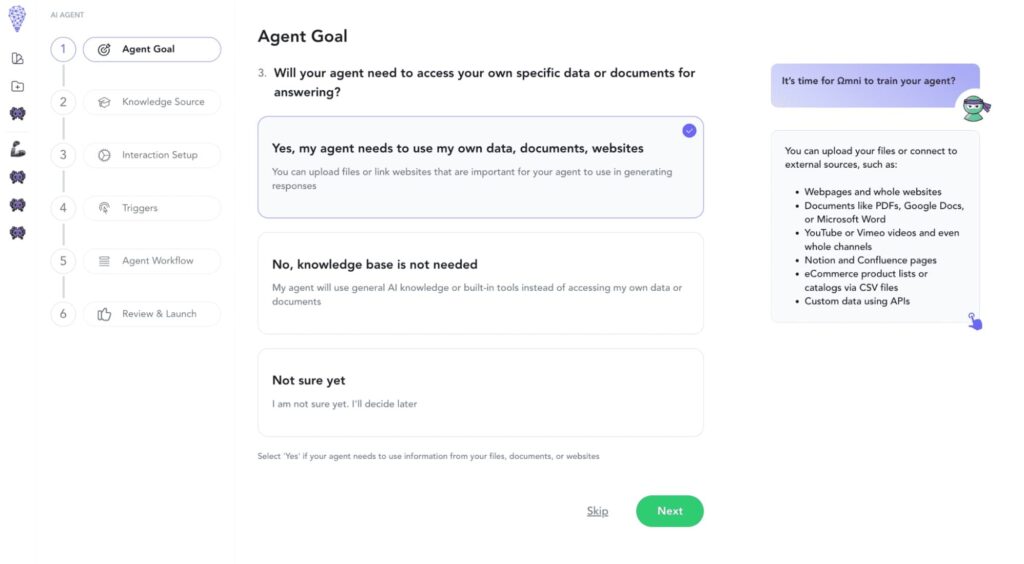
This critical step ensures HIPAA compliance and accurate medical information.
Clinical Operations Documentation:
- Facility hours and emergency protocols
- Department directories
- Insurance networks and coverage details
- Appointment scheduling procedures
- Telehealth guidelines
Patient Care Resources:
- Pre/post-procedure instructions
- Medication guidelines
- Patient rights documentation
- Privacy policies (HIPAA)
- Admission/discharge protocols
Administrative Procedures:
- Registration workflows
- Payment policies
- Insurance procedures
- Medical records requests
- Referral protocols
Educational Materials:
- Condition-specific information
- Preventive care guidelines
- Post-treatment care instructions
- Medication management guides
- Wellness resources
Step 5: Choose The Right Chat Interface
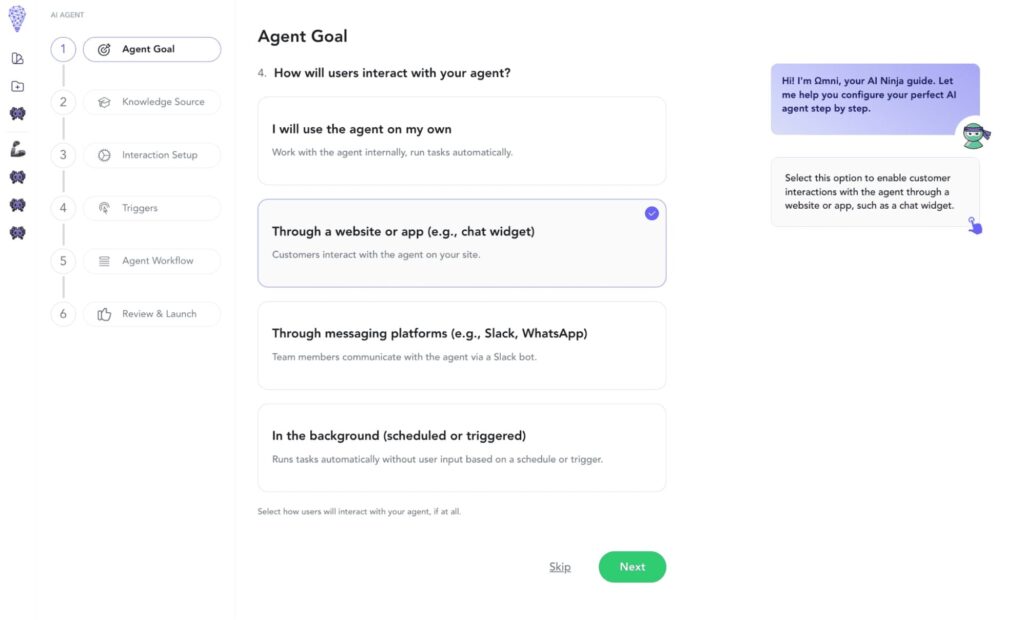
Select “Popup Chat” for maximum accessibility while maintaining privacy.
Step 6: Define Healthcare Communication Parameters
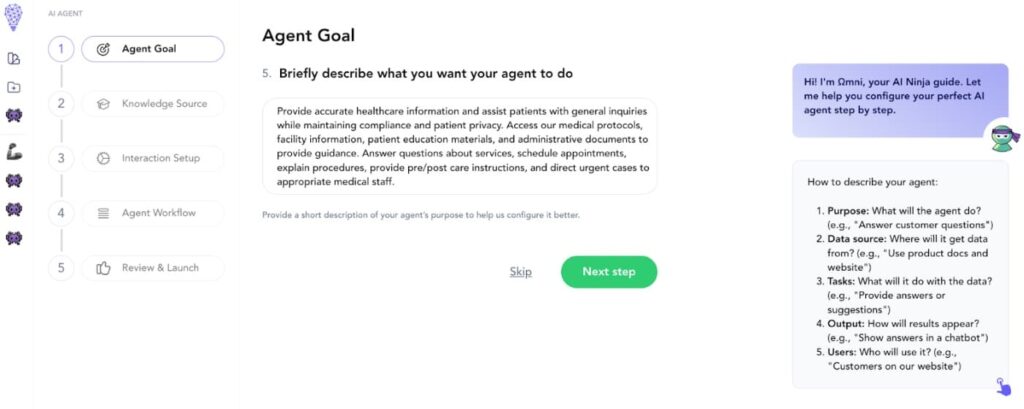
Craft precise instructions for patient interaction:
Core Functions:
✅ Verify non-emergency nature of inquiries
✅ Provide accurate medical information
✅ Direct urgent cases to emergency services
✅ Schedule appointment requests
✅ Explain medical procedures
✅ Clarify insurance coverage
Example Instruction:
“Provide accurate healthcare information and assist patients with general inquiries while maintaining HIPAA compliance and patient privacy. Access our medical protocols, facility information, patient education materials, and administrative documents to provide guidance. Answer questions about services, schedule appointments, explain procedures, provide pre/post-care instructions, and direct urgent cases to appropriate medical staff.”
Step 7: Select Your Tools & Services
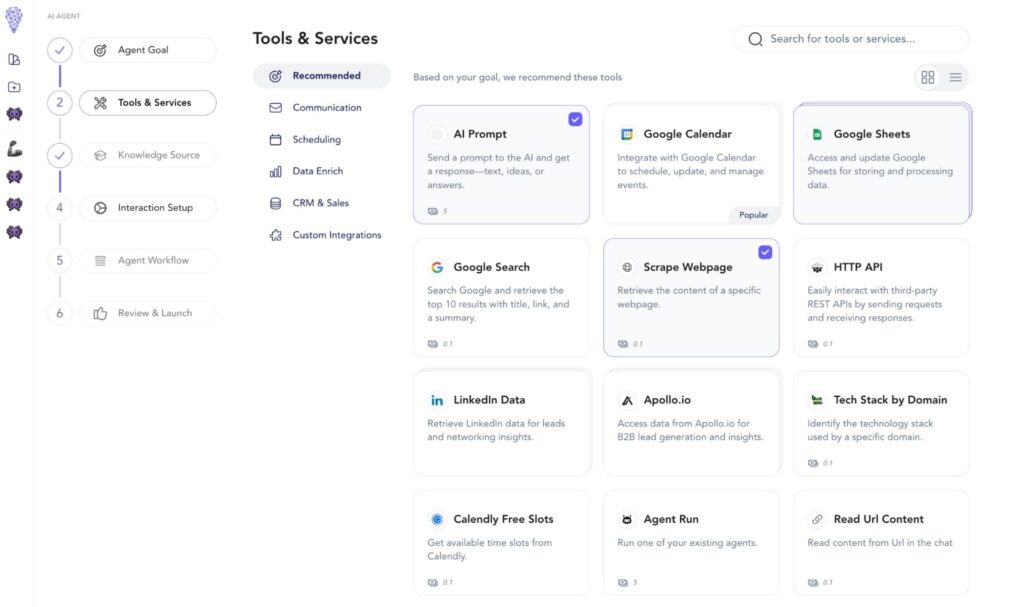
Enhance your healthcare assistant with these essential tools:
AI Prompt:
- Generate HIPAA-compliant responses
- Maintain medical accuracy in explanations
- Process patient inquiries with appropriate medical context
- Ensure proper medical disclaimer inclusion
- Handle appointment scheduling requests
- Provide clear emergency escalation protocols
Webpage Scraper:
- Extract current information from your healthcare website
- Keep facility hours and services up to date
- Maintain accurate insurance network information
- Update physician directories automatically
- Monitor changes in medical service offerings
- Track updates to patient resources
Google Sheets Data Reader:
- Manage appointment availability schedules
- Track insurance provider updates
- Maintain current procedure pricing
- Update medication formularies
- Monitor department operating hours
- Handle patient educational resource lists
💡 Pro Tip: Configure each tool with appropriate access permissions to maintain HIPAA compliance and patient data security.
Step 8: Add Secure Knowledge Sources
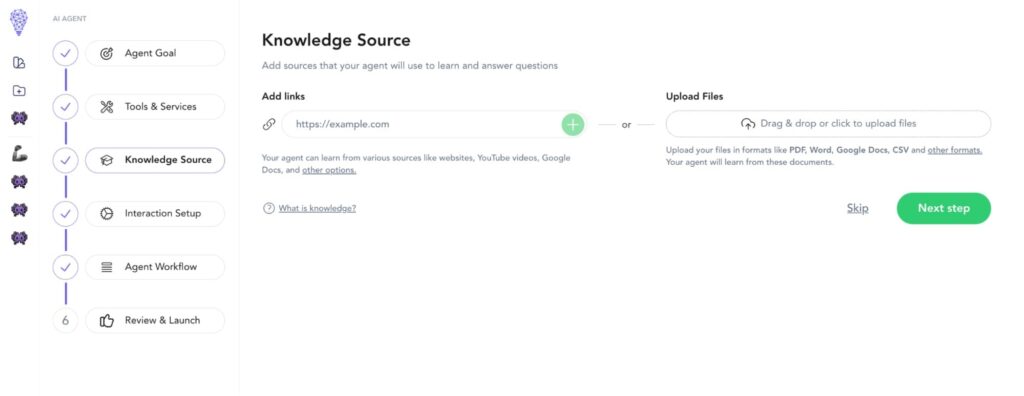
Integrate healthcare information through approved channels:
Digital Resources:
📌 HIPAA-compliant documentation
📌 Medical procedure guides
📌 Insurance policy information
Secure Document Upload:
📄 Clinical protocols (PDF)
📄 Patient education materials (DOCX)
📄 Healthcare forms (PDF)
📄 Procedure guides (PDF)
Step 9: Set Up Chat Interface
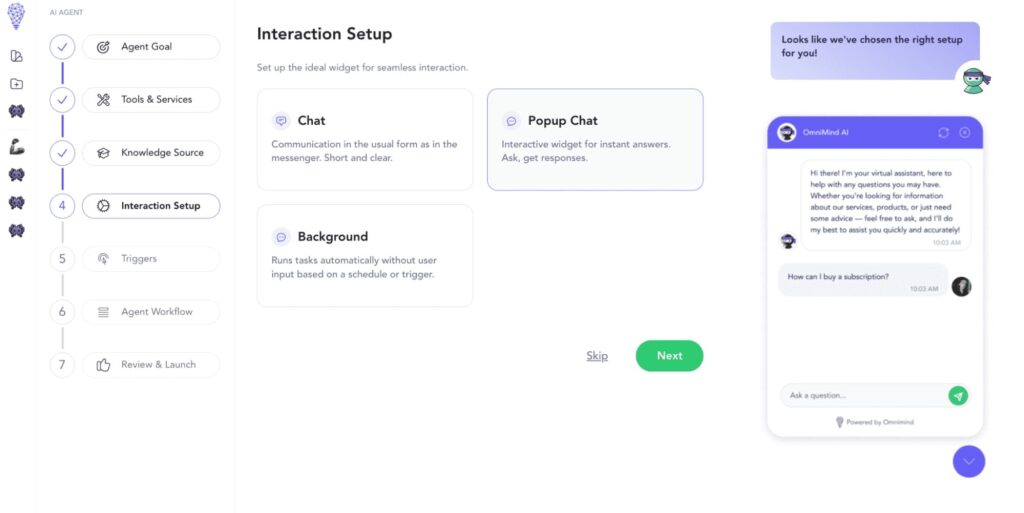
Select “Popup Chat” as your interface option to create an accessible, secure healthcare communication channel.
Website Integration:
✅ Embed the chat widget on any page of your healthcare website
✅ Deploy across multiple medical department pages
✅ Implement on patient portals and scheduling platforms
✅ Add to medical resource libraries
✅ Include on insurance and billing information pages
Step 10: Set Medical Response Triggers
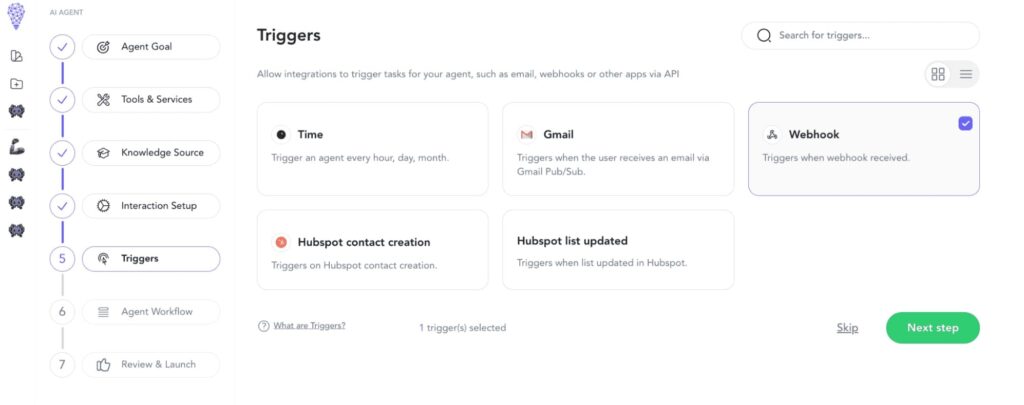
Establish automated healthcare workflows:
📢 When a form is submitted, send a confirmation alert with the doctor on duty’s details.
⏳ Use time triggers to follow up on unanswered inquiries and redirect to a human agent to ensure no emergency is overlooked.
Step 11: Ready to Launch!
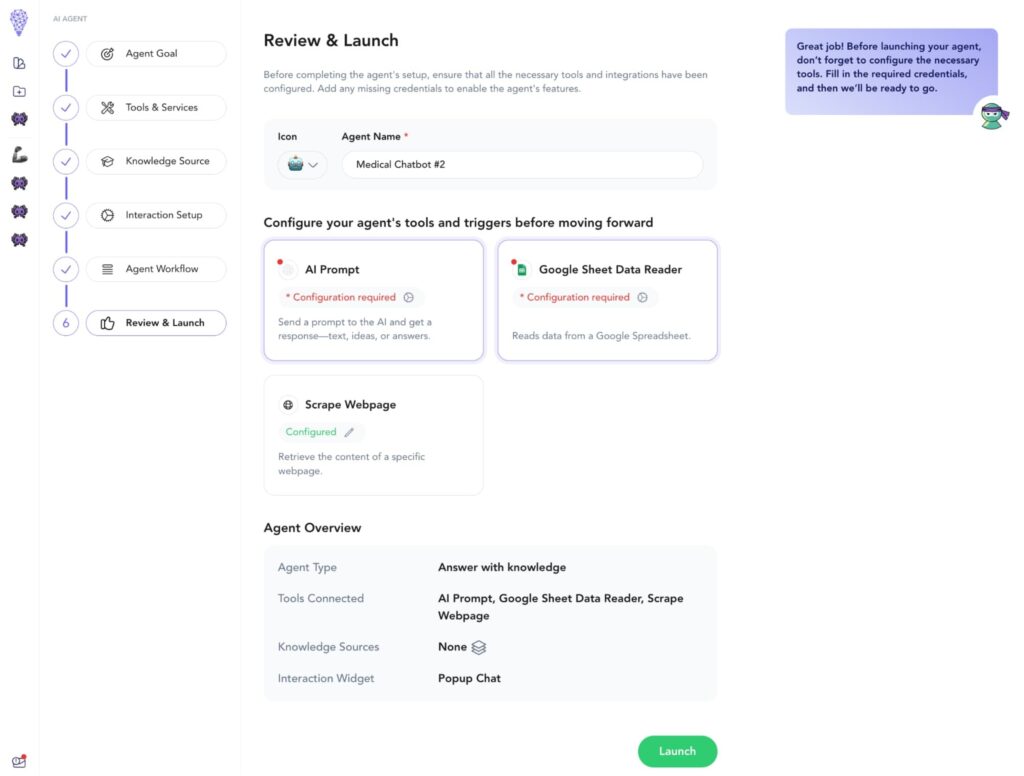
Let’s give your support assistant its final touches:
Name and Identity:
- Choose an icon that represents healthcare (medical cross, stethoscope, or caring hands).
- Name your bot “Healthcare Assistant,” “Patient Care Guide,” or something that reflects its medical support role.
- Ensure the name conveys medical professionalism while remaining approachable.
Configure Your Selected Tools:
AI Prompt Settings:
- Choose your preferred model (OpenAI, Anthropic, etc.).
- Configure response style to be professional, clear, and empathetic.
- Set appropriate knowledge parameters for medical content.
- Enable medical disclaimers and emergency protocols.
- Ensure HIPAA-compliant communication standards.
Google Sheet Data Reader:
- Connect to appointment scheduling sheets.
- Link to service availability calendars.
- Access insurance provider lists.
- Connect to department hours and contact information.
- Enable secure access to medical resource directories.
Elevate Your Healthcare Communication
The Healthcare AI Assistant represents a fundamental advancement in patient communication—ensuring accurate, compliant, and timely information delivery while maintaining the highest standards of patient care.
Transform your patient support experience today! 🚀
⚠️ Important Note: Always ensure your AI assistant includes appropriate medical disclaimers and clear pathways to emergency services. This tool is designed to supplement, not replace, professional medical care.

How useful was this post?
Click on a star to rate it!
Average rating 0 / 5. Vote count: 0
No votes so far! Be the first to rate this post.
